Sensory Room Design Guide for Home
Home sensory room layout, lighting, and pressure tools. Closet nooks vs clinic rooms, skip flags, listing checks.
DeepPressureStimulation.com editorial team
Site desk, DeepPressureStimulation.com ·
📖 Table of Contents
Affiliate Disclosure: As an Amazon Associate we earn from qualifying purchases. Some links on this page are affiliate links - if you buy through them, we receive a small commission at no extra cost to you. This never influences which products we recommend. Full disclosure policy · How we make money
Sensory Room Design Guide for Home
Updated September 14, 2026 | Byline: DeepPressureStimulation.com editorial team
A spare closet with a crash pad and a dimmer can be a useful reset corner. It is not a $30,000 clinic. A closet nook is not a clinic Snoezelen. That is the unique angle on this page.
This is a research-desk note from the DeepPressureStimulation.com editorial team. We match home layouts to listing copy, published multi-sensory-environment papers, and community build threads. We did not install a swing in a lab. A home room is a recovery and care space, not a diagnosis, not a treatment room, and not a hormone protocol.
Low-cost tools that belong in the bin before you buy a bubble tube are on DIY deep pressure tools. No-equipment sequences are activities at home. Adult joint work is proprioceptive input for adults. A daily sketch is how to create a sensory diet at home. Start at the sensory-tools hub if you are still picking an aisle.
Medical disclaimer: Informational only. Ask a clinician before weighted, hanging, or enclosed equipment if you have breathing, circulation, mobility, or cardiac concerns. Unsupervised hang is a skip. The user must be able to exit every tool independently.
What a home room can actually do
Clinic Snoezelen rooms from the 1970s onward are controlled multi-sensory environments staffed by people who can stop a session. A 2019 Frontiers in Psychology paper on multi-sensory environments reported reduced agitation and better engagement in some people with developmental disabilities (Breslin & Rudisill, 2019). That is a clinic-adjacent literature, not a Pinterest shopping list, and not a cortisol caption.
A home version is cheaper and less supervised. That is the risk. Design for the person who will use it — seeker vs avoider — and for the joist, not the catalog.
Budget reality: a corner can start around the cost of a pad, a dimmable bulb, and a blanket you already own. A dedicated room with a ceiling swing and lighting can run into four figures. Professional padded rooms cost more than a kitchen remodel. Spend on hardware ratings before fiber-optic curtains.
Step 1: Pick a space you can control
You do not need a spare bedroom.
- Spare room or office: closeable, best control.
- Walk-in closet: easy to darken; watch ventilation and exit.
- Bedroom corner: curtain or canopy; not fully enclosed.
- Basement zone: quieter, cooler; watch moisture and egress.
- Under a loft bed: a nook, not a swing mount unless the frame is rated for it.
Minimum: about 4×6 feet for a pad and a seat. Comfortable: 8×10 for movement plus a calm side. Ideal: 10×12 with two zones.
Must-haves in the room, not the cart: dimmable light, a way to cut street light, a quieter location, a floor you can fall on, a temperature you can live with, and walls that are not a sticker explosion.
Step 2: Design for the profile you actually have
Seekers often want crash, jump, squeeze, swing, and texture. Avoiders often want dim, quiet, enclosed, and predictable. Mixed profiles need two zones and a way to turn things off.
Autonomy is the therapeutic idea that survives translation to a closet: the person can start and stop the input. A room where lights, sound, and textures are all stuck on is stimulation, not regulation.
Match tools on the sensory-diet page. Do not copy a clinic photo for a child who covers their ears in grocery stores.
Step 3: Equipment — pressure first, gadgets second
Deep pressure zone
Foundation, not decoration.
- Weighted blanket: 10–15 lb is a common adult trial range, not a medical dose. Size it on the weight guide. Drape it on a beanbag, do not pin a child under it.
- Body sock: stretch resistance. Face opening and independent exit. See body socks.
- Crash pad: a thick mat for landing or lying. Milliard Crash Pad is a search, not a lab pick.
- Bean bag or large floor cushion: light compression from the fill.
Nice-to-haves: a compression vest for leaving the room, a lap pad for seated time, a weighted plush for transitions. SensaCalm Weighted Lap Pad stays a search.
Lighting
Harsh overhead light is alerting for a lot of people. Warm, dim, controllable light is the starting point.
Must-haves: a dimmable warm bulb and blackout on the window. Nice-to-haves: slow LED color (30–60 second cycles), fiber-optic strands, a bubble tube, a slow nature projector. Fast, high-contrast projections are a skip for avoiders.
Govee LED Strip Lights is an existing search-style listing already used on this URL. Playlearn Sensory Bubble Tube stays a search.
Sound
Must-haves: a white-noise source and a pair of headphones the user can put on and take off. Nice-to-haves: a small speaker, foam panels if the room rings, a rain stick they control.
Sony WH-1000XM5 is an adult search; kids need a kids-sized, volume-limited pair. This desk did not measure noise reduction.
Movement zone (seekers)
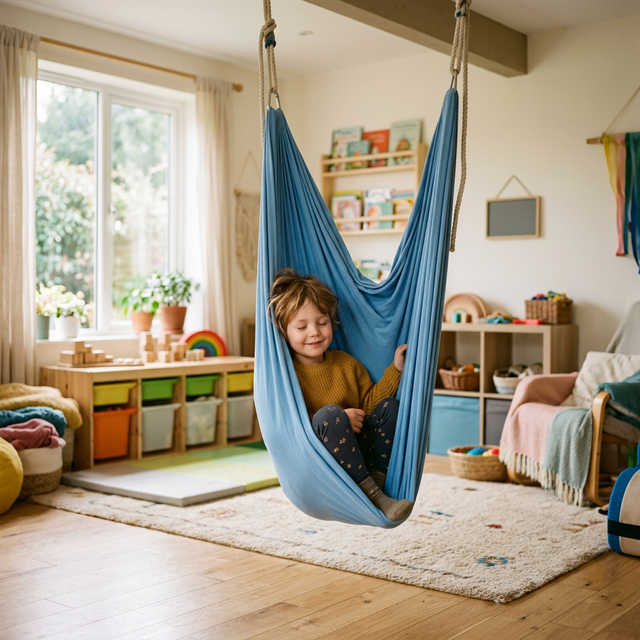
- Indoor sensory swing: ceiling joists, rated hardware, published weight limit for a moving load. A listed hold is not a swinging load — that honesty note is on the sensory swing guide. Unsupervised hang is a skip.
- Mini trampoline: short jump sessions, padded floor, stable legs. BCAN Foldable Mini Trampoline stays a search.
- Tunnels, wall bands, a slow spinning seat if vestibular input is already known to help.
Step 4: Layout without the Pinterest pile-on
Single zone (closet or corner): pad, one blanket, one body sock on a shelf, dimmer, white noise, a curtain. That is a room.
Two zone (medium): active side (swing or trampoline plus pad) and calm side (beanbag, dim, headphones). Put calm farther from the door.
Three zone (large): add a tactile tray you can put away. Visible storage. Open floor for a body sock.
Leave space. If they cannot see the tool, they will not use it. If every surface blinks, avoiders will not enter.
Budget — hardware before glitter
| Budget | What is honest |
|---|---|
| $200–500 | Pad or thick comforters, a blanket you can lift, dimmable bulb, white noise, a body sock |
| $500–1,000 | Above plus a beanbag, LED strips, headphones, a mini trampoline |
| $1,000–2,000 | Above plus a professionally mounted swing, a bubble tube, panels |
| $2,000+ | Padded floor, custom lighting — still not a staffed clinic |
Save money with comforters as a pad trial, a DIY body sock from stretch fabric (exit first), a pop-up tent as a nook, and a regular rebounder instead of a therapy brand. Builds: DIY tools.
Common build mistakes
Too much stuff. Start empty-ish. Add what they reach for.
Building for the parent’s Pinterest board. Watch the user for a week before the cart.
No off switch. Every input needs a stop.
Skipping safety. Anchor swings to joists with rated hardware. Pad under movement gear. Secure tall shelves. Remove cords that can wrap a neck. If a child uses the room alone, nothing they can fall under, hang from, or get stuck in.
When to skip a home sensory-room haul
Skip a ceiling swing until a joist and rated hardware are confirmed. A listed static hold is not a swinging load. Unsupervised hang is a skip.
Skip enclosed pods, hanging sacks, or loft-bed straps for anyone who cannot get out alone, or for anyone whose panic gets worse in wraps.
Skip a weighted blanket the user cannot lift. Cannot lift is a skip for the nest and for overnight use.
Skip a crash-and-jump zone for people with neck, bone, or bleeding-risk conditions unless a clinician signed off.
Skip a fully sealed closet with no adult nearby and poor air. Breathing issues are a medical skip.
Skip a $2,000 lighting package before you have a dimmer and a pad. Gadgets are not a profile.
Skip any kit sold as clinic-equivalent or OT-designed by this website. This desk is not a licensed occupational therapy practice.
Listing checks before you buy sensory-room equipment
These are listing checks from the DeepPressureStimulation.com editorial team — photos and age rows, not a room we built.
- Read the load, not the “sensory room bundle” badge. Swing hardware needs a dynamic rating and joist instructions.
- Confirm age and weight on pads, socks, and swings. A kids sock on an adult is a sausage casing.
- Check exit: face opening, zipper they can work, no sewn-in hood that traps.
- For lighting, prefer dimmable and slow. Fast strobe modes are a migraine aisle.
- For headphones, check volume limiting on kids SKUs.
- Keep the return window. A week in one corner beats a seven-box haul.
- Named products we already track: Mosaic lap pad, Fun and Function lap pad. Swing ASIN already used on the swing guide:
B08CGNC6VV(Harkla). Search links stay ondeeppressurestimulation-20. - How this site is paid: How We Make Money.
Compare crash pads · Compare sensory swings
Frequently Asked Questions
How much does a home sensory room cost?
A honest corner can start in the low hundreds with a pad, a dimmer, and a blanket you can lift. A swing-and-lighting room can reach $1,000–$2,000. A staffed clinic room is a different category of spend.
What age is a sensory room for?
Any age, with different skips. Toddlers need supervision and no hang gear. School-age kids may use swings and socks if they can exit. Adults often want pressure, light, and sound control without calling it a sensory room.
Do I need an occupational therapist to design it?
Helpful, not required. A licensed OT can sort seeking vs avoiding. You can still start with a dimmer and a pad if you already know what they reach for. This desk is not that consult.
Can a sensory room help with meltdowns?
It can be a retreat people choose when they feel escalation starting. It is a poor punishment room mid-meltdown. Nothing here treats a medical emergency. Get clinical help if self-injury or breathing trouble is in the mix.
Is a closet safe?
Only if air, exit, and supervision are honest. A closed closet with a hanging sack and no adult is a skip.
Frequently Asked Questions
Cost?
A corner is cheaper than a clinic. Hardware ratings beat glitter.
Age?
All ages, different skip lists. Toddlers are supervised.
Meltdowns?
A chosen retreat, not a sent-away room.
Explore More
DeepPressureStimulation.com editorial team
Site desk, DeepPressureStimulation.com
The DeepPressureStimulation.com editorial team writes guides to weighted blankets, compression wear, and sensory tools from peer-reviewed research, published occupational-therapy guidelines, manufacturer specifications, and community reviews. The desk is not a licensed occupational therapy practice or medical clinic, and nothing here is medical advice — always consult a qualified healthcare provider before starting a new therapy.
Stay Informed, Stay Calm
Get science-backed articles on deep pressure therapy, weighted blankets, and sensory tools delivered to your inbox. No spam — just calm.
📬 No spam, ever. Unsubscribe anytime.